Showing posts with label Texture Paste. Show all posts

Sunday, June 28, 2015

Loves Rubber Stamps Sensational Sunday Hop!

Welcome to the Loves Rubber Stamps Sensational Sunday Blog hop! The Design Team has created some gorgeous projects for your inspiration. Check out each link and leave a comment. If you get lost along the way, each top has a full list of all the links. One of the Design Team posts is the hop's Sensational Sunday Sweet Spot and a name will be drawn from that list of comments to be in a monthly drawing for a $20 Loves Rubber Stamps Gift Voucher!  We will draw the winner of the voucher the first Sunday of each month from all the comments left on the Design Team blogs! Remember you have until 8:00 pm CST Saturday to leave your comments.

It's summertime and there's nothing better than a little ice cream to cool you off on a hot day- or any day for that matter! Love this stamp set from Paper Smooches! I used texture paste (colored with Distress ink) to give the actual ice cream scoop it's texture and of course had to add some sprinkles!

Supplies:
Paper Smooches Hey Sugar
Distress Ink Worn Lipstick
Distress Ink Spiced Marmalade
Distress Ink Gathered Twigs
Distress Reinkers
Distress Embossing powder
Versamark Ink
Ranger Non-stick craft mat
Ranger Gold Embossing powder
Neenah Solar White Card stock
Sizzix Embossing Folder

I am your last stop on the hop so I hope you have enjoyed all the inspiration! Remember to comment on all the Designer's blog including mine below for a chance to win the $20 Gift voucher - you never know which stop is the Sweet Spot so be sure to visit them ALL!


Tuesday, June 9, 2015

Loves Rubber Stamps Challenge #155 Spots & Dots DT Inspiration


Good Morning all and Happy Tuesday! Looks like some T-storms coming our way today so it may be a quiet day on the golf course today! (We live on a golf course overlooking the 18th hole, so this is a busy time of year for us!),
This week's Loves Rubber Stamps Challenge is SPOTs & DOTS so I thought I would go with a golf themed card and simulate the dimples of the golf ball as the SPOTS and DOTS for my DT inspiration  card.

For this card I used the Simon Says Stamp Tiny dots stencil with texture paste and masked off a circle in the middle for the stamped image.  Just love this technique - thanks to Jennifer McGuire and gang and the Mask-erade online class! The circle mask was cut with a Spellbinders Nestabilities circle die from plain white paper and then I ran it through the Xyron Creative Station- loaded with the 5"repositionable adhesive to make my own masking paper!! (video to come soon!)
I framed the entire piece with paper straws- ran them through my Xyron Creative Station (9" Permanent adhesive) to adhere.

Supplies:
Paper Smooches Paper Smooches My Guy Stamps
Memento Tuxedo Black Ink
Copic Markers
Spellbinders Nestabilities Medium Circle Die
Ranger Non Stick Craft Mat
Ranger Texture Paste
Simon Says Stamp Tiny Dots Stencil
Xyron Creative Station
Xyron 5" Repositionable Adhesive Cartridge
Xyron 9" Permanent Adhesive Cartridge
Paper Straws
Neenah Solar White Card Stock

So stop on over and join the fun this week for the Loves Rubber Stamps SPOTS & DOTS challenge

I am entering this project in the Paper Smooches Sparks Anything Goes challenge!


Thursday, May 28, 2015

Creative Vision Stamps Showcase

Happy Thursday! Today I am showcasing this adorable dog stamp from Creative Vision Stamps which I  used this week for the DT inspiration project at 613 Avenue Create! 

 Be sure to stop over to the 613 blog and play along with this week's CYOC! 


For my card I used a stamped image, a sentiment, glossy accents, enamel dots, and baker's twine.

For those that know me- you know how much I love dogs!! So I was so excited to use this stamp in a project!  I got the idea for this project from my partner Katie who made me the best Mother's Day card from our doggies and used this stamp- and put wings on the doggie because our beloved Quincy had just passed away. I decided to to use the wings idea but put a different spin on it and use it as an "ethereal" get well card.                                   

The sky background was created with various shades of blue Distress ink using a blending tool. 
The clouds on this cards were created with texture paste and a stencil- then I placed Judykins sparkle embossing powder on the texture paste.  Normally I would wait for the paste to dry completely before heating the embossing powder, but this time I decided to heat it sooner to get some "puff" in the clouds.  When you heat texture paste it tends to puff out or bubble. This was a super cool effect I achieved! 
The doggie was colored with Copic Markers and cut out and along with wings (die cut from grunge board and covered with Distress glitter) popped onto the card with dimensional foam tape. Enamel accents were used to make the eyes pop and glossy accents was applied to the bone! 

The Get Well sentiment  and the heart (also from Creative Vision Stamps) was added along with the baker's twine!


Tuesday, May 19, 2015

Technique Tuesday for Honey Bee Scraps

Good Morning!
Every Tuesday I have a feature called Technique Tuesday with Pam on the Honey Bee Scraps blog!
Check out the Honey Bee blog and the fun stamp sets that Melissa offers! Be sure to like the Bee on Facebook too!
Excited to show you a new technique this week - coloring and embossing texture paste. In addition to sharing this technique, I also wanted to show the versatility of the Honey Bee Scraps stamps so I will be using the same stamps set in two very different style cards- one clean and simple and the other what I call "mainstream grunge".

The stamp set featured today is "Oh, Snap!" and I used a few different sentiments from the set in my projects! I just love all the great sentiments in this set!

So let's talk about the technique!
The first card features the colored embossed texture paste as the background for this clean and simple look:


To start place the stencil over a piece of white cardstock and secure with post-it tape on the edges. It's super important that the stencil does not move when applying the paste.

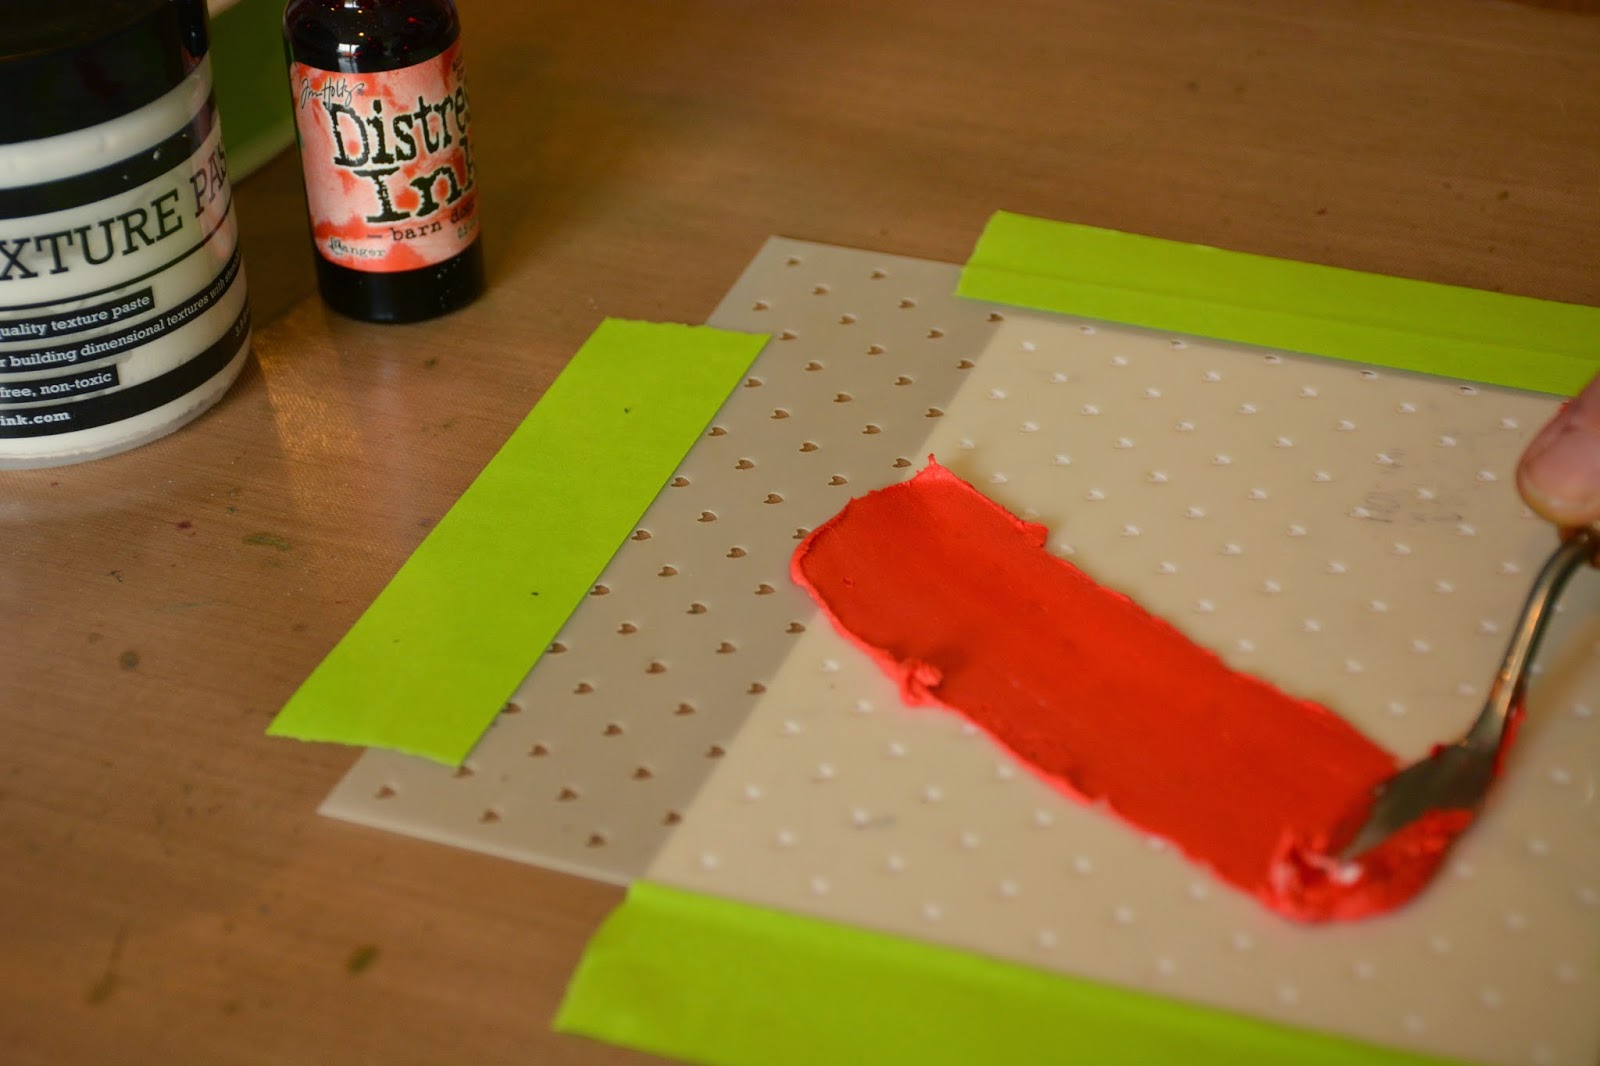
For this technique I am using white texture paste from Ranger and coloring it with Distress ink refills. Place a scoop of texture paste onto your craft mat and add a few drops of Distress ink.

Mix well with a palette knife until the desired color is achieved- the consistency of the paste should remain like cake icing- if too much color (liquid) used the paste will be thin-and you will have to add more.


Spread as if icing a cake - a thin layer of paste onto the stencil.


Ensure all open areas of the stencil are covered with paste and scrape of the excess.


Carefully remove the stencil from the paper-removing the tape and lifting slowly. Immediately place stencil into a small tub of water or wash as the texture paste will dry onto the stencil.


While the paste is still wet cover with your favorite "sparkle" embossing powder.


Shake off excess powder carefully and set aside to dry completely.


Once the paste/powder is dry, melt the embossing powder using a heat tool. Be careful not to overheat as the texture paste will "bubble".


Now your textured sparkly red heart background is ready to use on your card!

Using the same stamp set, but with a very different style
one I call "mainstream grunge" I also created this card!


Stay tuned in the coming weeks for techniques used in this card to alter the patterned paper and make the repeating background!

Thanks for joining me again this week for Technique Tuesdays for Honey Bee Scraps!

Embrace Imperfection!

Pam