Showing posts with label Honey Bee Scraps. Show all posts

Tuesday, June 23, 2015

Technique Tuesday with Pam Honey Bee Scraps

Good morning everyone! Welcome back to another Technique Tuesday! I just returned from a weekend road trip to Maryland for a family wedding so of course I thought it appropriate to showcase the Honey Bee Scraps No Place Like Home stamp set today! The technique is a simple one but super versatile - I will be showing you how to ink your embossing folders for a little extra color and added dimension to dry embossing!
Here's the super cute suticase I made!

DSC_7668 1
To create the embossed background for the suitcase itself- follow these simple steps below- this can be done with any embossing folder and any non-permanent ink.

Begin by opening the embossing folder and inking gently with the ink pad the raised portion of the embossing folder.

.Carefully place a piece of 4.25" x 5.5" card stock (for this project I am using Neenah Desert Storm) inside the embossing folder. 
Carefully place a piece of 4.25" x 5.5" card stock (for this project I am using Neenah Desert Storm) inside the embossing folder.


Close the embossing folder carefully so the card stock does not move within the embossing folder.

Run the folder through your favorite die cut machine to dry emboss the paper.

Remove the card stock from the folder and depending on if you inked the negative or positive side of the folder you will have ink on the debased portion or the embossed portion.
Be sure to clean the ink off your embossing folder as well- with a wet paper towel or baby wipe so not to contaminate future projects.
Be sure to clean the ink off your embossing folder as well- with a wet paper towel or baby wipe so not to contaminate future projects.[/caption] I love how this technique gives extra depth to the dry embossing- I used Vintage Photo Distress ink here to give the suitcase the "grungy" vintage look as well.
I finished off the project by stamping a few of the sentiments from the No Place Like Home stamps set onto die-cut mini postage stamps- to give the look of old stickers on an old valise! I used my Xyron 1.5" Sticker Maker to adhere both the ribbon and the postage stamps!

DSC_7674
I also added the ribbon for a strap and made a "leather" handle from Kraft Glassine paper.
Hope you enjoyed taking this journey with me today and hope you give this technique a whirl!
Embrace Imperfection!
Pam

Tuesday, June 16, 2015

Technique Tuesday with Pam (Honey Bee Scraps)

Happy Tuesday! Welcome back for another Technique Tuesday with Pam. Today I am going to create a simple "night sky" background with Distress Inks, which pairs perfectly with the sentiment "I Love you to the Moon and Back" from the Honey Bee set Not Too Shabby.
   DSC_7519
Creating a night sky is super simple and you can can get such fabulous results, different every time.
Let's get started:

Start by applying a dark shade of purple Distress ink (Dusty Concord) to the center areas of white card stock (4.25" x5.5"). 
Start by applying a dark shade of purple Distress ink (Dusty Concord) to the center areas of white card stock (4.25" x5.5").
One of the best things about Distress Ink is it's blendability!
Add various shades of blue Distress with a mini blending tool around the edges and blend with the purple.  
Continue by adding various shades of blue Distress ink to edge areas with mini ink blending tool and blend with purple.

.The final result using 3 colors of Distress.
The final result using 3 colors of Distress.

Try using different colors of Distress to creating varying "night skies" or even add some yellow, orange or pink hues for a great sunset.
To add the twilight stars effect spritz a splatter brush with Hero Arts Unicorn white spray ink. 
To add the twilight stars effect spritz a splatter brush with Hero Arts Unicorn white spray ink.

 Tap the brush gently to add tiny dots of white color to your night sky.Dry thoroughly with heat tool. 
Dry thoroughly with heat tool.

I just love the tiny dots you can achieve with a splatter brush.
To add more dimension, spritz water into your and flick onto the background.

To add more dimension, spritz water into your and flick onto the background.    

Because Distress Ink reacts with water you will se these drop;gets lighten and remove some o f the ink creating the dimension. Dry with heat tool. 

Because Distress Ink reacts with water you will se these drop;gets lighten and remove some o f the ink creating the dimension. Dry with heat tool. Distress ink is so reactive with water- amazing droplet shapes are created with this technique (from Tim Holtz "spritz and flick")

Now you have created this simple night sky. I encourage you to experiment with different colors of distress, perhaps adding a bit of a sunset as well. You will be amazed at the results when you just "play".
To finish off the card I added a die cut moon and the sentiment (stamped in Versamark black and embossed with clear embossing powder). I also matted the background with a silver lining to match the background paper.  This is so easy to create even if you don't have metallic paper. Check this out:
Apply Versamark watermark ink to the edges of your white card stock. 
Apply Versamark watermark ink to the edges of your white card stock.

Sprinkle Metallic Silver embossing powder over the areas covered with Versamark. 
Sprinkle Metallic Silver embossing powder over the areas covered with Versamark.Melt the embossing powder with a heat tool. 
Melt the embossing powder with a heat tool.

This is such a great way to created a matted background when you do not have metallic card stock! Great technique that I learned from Jennifer McGuire.
To finish off the card I adhered the layers together, popped the sentiment and moon with dimensional tape.
DSC_7523


DSC_7524  
Thanks again for joining me this week for another Technique Tuesday!  Be sure to leave a comment below and let me know what other "techniques" you are interested in seeing here on the blog! Yes, I am taking requests!
Embrace Imperfection!
Pam

Monday, May 25, 2015

Happy Memorial Day!

Happy Memorial Day everyone! I hope you all had a fabulous Memorial Day weekend! My project/tutorial today is in celebration of Memorial Day and all those who sacrificed their lives for this great country-we Thank You!
The technique I am featuring today uses acrylic paint with stencils and what I call stencil masking.  I love to use my stencils in different ways and often combine them to "paint my own picture."   The stamp set from Honey Bee Scraps is No Place Like Home and has the perfect sentiment for this card!

 Let's take a look at the project:


To make the flag background I combined two stencils from The Crafter's Workshop-check out the steps below:


Place your stencil (stripes) atop a 6x6 piece of manila/white 
card stock
 and mask off portion in left hand corner 
(where your stars will be place) with post-it tape.


Secure the stencil and card stock to your work surface with additional
 tape to ensure project does not move while applying the paint to the stencil


Apply red acrylic pain (Ranger Cherry Red) to craft mat.


Using a blending tool with foam, pick up some of the paint and dab
 lightly onto the open
 areas of the stencil until all portions are covered. 
Be careful not to press done too hard while dabbing 
as this will cause bleeding under the stencil.


Dry thoroughly with a heat tool.
  It is essential that the paint is completely 
dry before proceeding to the next step.


Place the stars stencil over the black
 portion of your project and secure with post-it tape.


As above with the red, apply the blue acrylic paint to the open
 areas of the star stencil, taking care not to overlap 
onto the red stripes. 
(You can mask all the way around the stars to prevent any overlap if needed)


Depending on your preference, you can ink over 
the flag with Distress ink (using a blending tool). 
 I used Antique Linen, to give the flag a somewhat vintage look.


To finish off the card, I added the yellow ribbon,
 some die cut stars (painted with the same acrylic paints) and
 of course the sentiment from Honey Bee Scraps stamp 
set "No Place Like Home.


Thanks so much for joining me again this week! Happy Memorial Day! There's no place like home!

Embrace Imperfection!


Sunday, May 24, 2015

Loves Rubber Stamps Sensational Sunday Hop

Welcome to the Loves Rubber Stamps Sensational Sunday Blog hop! The Design Team has created some gorgeous projects for your inspiration. Check out each link and leave a comment. If you get lost along the way, each top has a full list of all the links. One of the Design Team posts is the hop's Sensational Sunday Sweet Spot and a name will be drawn from that list of comments to be in a monthly drawing for a $20 Loves Rubber Stamps Gift Voucher!  We will draw the winner of the voucher the first Sunday of each month from all the comments left on the Design Team blogs! Remember you have until 8:00 pm CST Saturday to leave your comments.

So I know it's spring and the weather has been beautiful (finally) but after Friday night's frost (only in New England lol!) I just couldn't resist using this cute little guy in a project and love the sentiment!
Supplies:
Glossy Accents
Enamel Accents
Ranger Texture Paste
Judy Kins Sparkle Embossing Powder
Distress Marker Spritzer
Penny Black Die Cut Word Bubble
TCW Stencil
Distress Glitter Clear Rock Candy
Recollections Glitter Card
Neenah Solar White Cardstock


I am your last stop on the hop so I hope you have enjoyed all the inspiration! Remember to comment on all the Designer's blog including mine below for a chance to win the $20 Gift voucher - you never know which stop is the Sweet Spot so be sure to visit them ALL!


Tuesday, May 19, 2015

Technique Tuesday for Honey Bee Scraps

Good Morning!
Every Tuesday I have a feature called Technique Tuesday with Pam on the Honey Bee Scraps blog!
Check out the Honey Bee blog and the fun stamp sets that Melissa offers! Be sure to like the Bee on Facebook too!
Excited to show you a new technique this week - coloring and embossing texture paste. In addition to sharing this technique, I also wanted to show the versatility of the Honey Bee Scraps stamps so I will be using the same stamps set in two very different style cards- one clean and simple and the other what I call "mainstream grunge".

The stamp set featured today is "Oh, Snap!" and I used a few different sentiments from the set in my projects! I just love all the great sentiments in this set!

So let's talk about the technique!
The first card features the colored embossed texture paste as the background for this clean and simple look:


To start place the stencil over a piece of white cardstock and secure with post-it tape on the edges. It's super important that the stencil does not move when applying the paste.

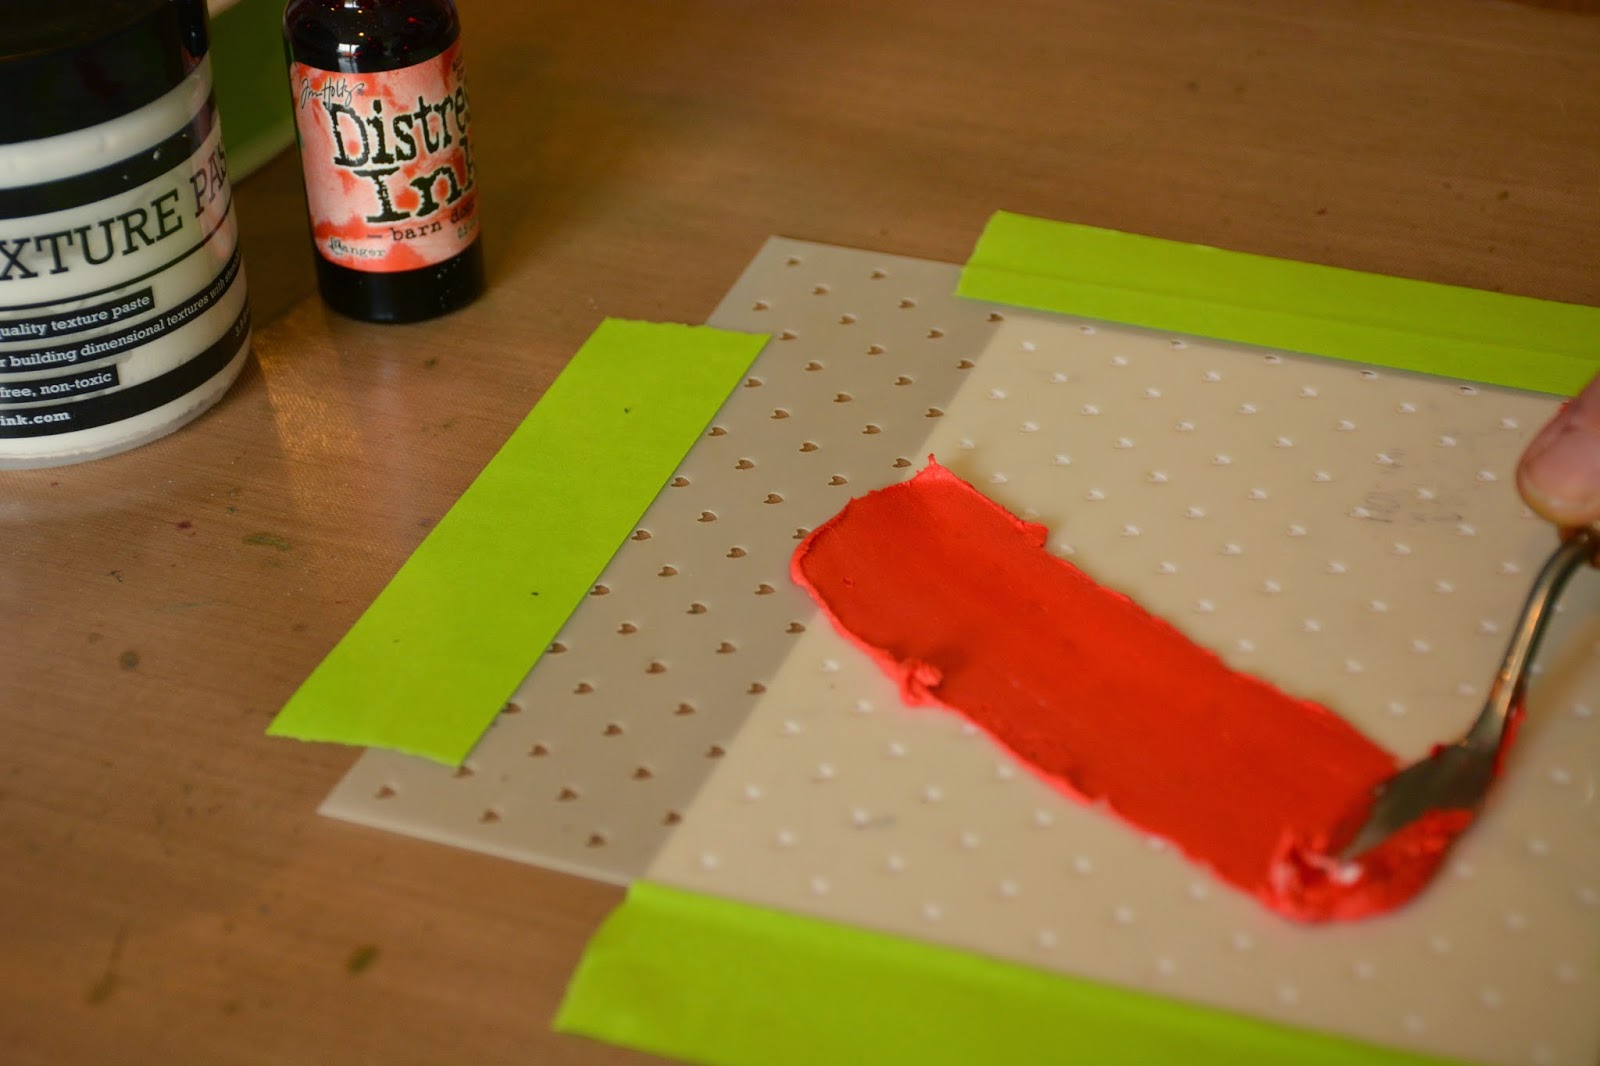
For this technique I am using white texture paste from Ranger and coloring it with Distress ink refills. Place a scoop of texture paste onto your craft mat and add a few drops of Distress ink.

Mix well with a palette knife until the desired color is achieved- the consistency of the paste should remain like cake icing- if too much color (liquid) used the paste will be thin-and you will have to add more.


Spread as if icing a cake - a thin layer of paste onto the stencil.


Ensure all open areas of the stencil are covered with paste and scrape of the excess.


Carefully remove the stencil from the paper-removing the tape and lifting slowly. Immediately place stencil into a small tub of water or wash as the texture paste will dry onto the stencil.


While the paste is still wet cover with your favorite "sparkle" embossing powder.


Shake off excess powder carefully and set aside to dry completely.


Once the paste/powder is dry, melt the embossing powder using a heat tool. Be careful not to overheat as the texture paste will "bubble".


Now your textured sparkly red heart background is ready to use on your card!

Using the same stamp set, but with a very different style
one I call "mainstream grunge" I also created this card!


Stay tuned in the coming weeks for techniques used in this card to alter the patterned paper and make the repeating background!

Thanks for joining me again this week for Technique Tuesdays for Honey Bee Scraps!

Embrace Imperfection!

Pam