Saturday, October 31, 2015

Deep Red Stamps & Xyron Tutorial & Giveaway!

Good morning crafters! Today I want to share with you a project I created using Deep Red Stamps and the fantastic adhesives and magnets from Xyron!
Deep Red Stamps is also generously donating a $45 coupon to one lucky winner - all you have to do to enter is leave a comment below by 11/9.  All names with be submitted and a winner will be randomly chosen from the entries.  They have some really fun stamps so make sure you enter!

Now on to the tutorial- for today's project I decided to use the Autism Awareness Ribbon stamp to make both a card and a magnet using my Xyron Creative Station. 


The tutorial will focus on how to make the magnet specifically. Here are the steps:


1. Ink the Autism Awareness Ribbon stamp using Memento Tuxedo Black ink.


2. Stamp onto white card stock.


3. Begin coloring the small "puzzle pieces" with Copic Markers: 


4. Continue coloring -alternating colors until the entire ribbon is completed.

\

5. Load the Xyron Creative Station with the 9" Magnet cartridge.


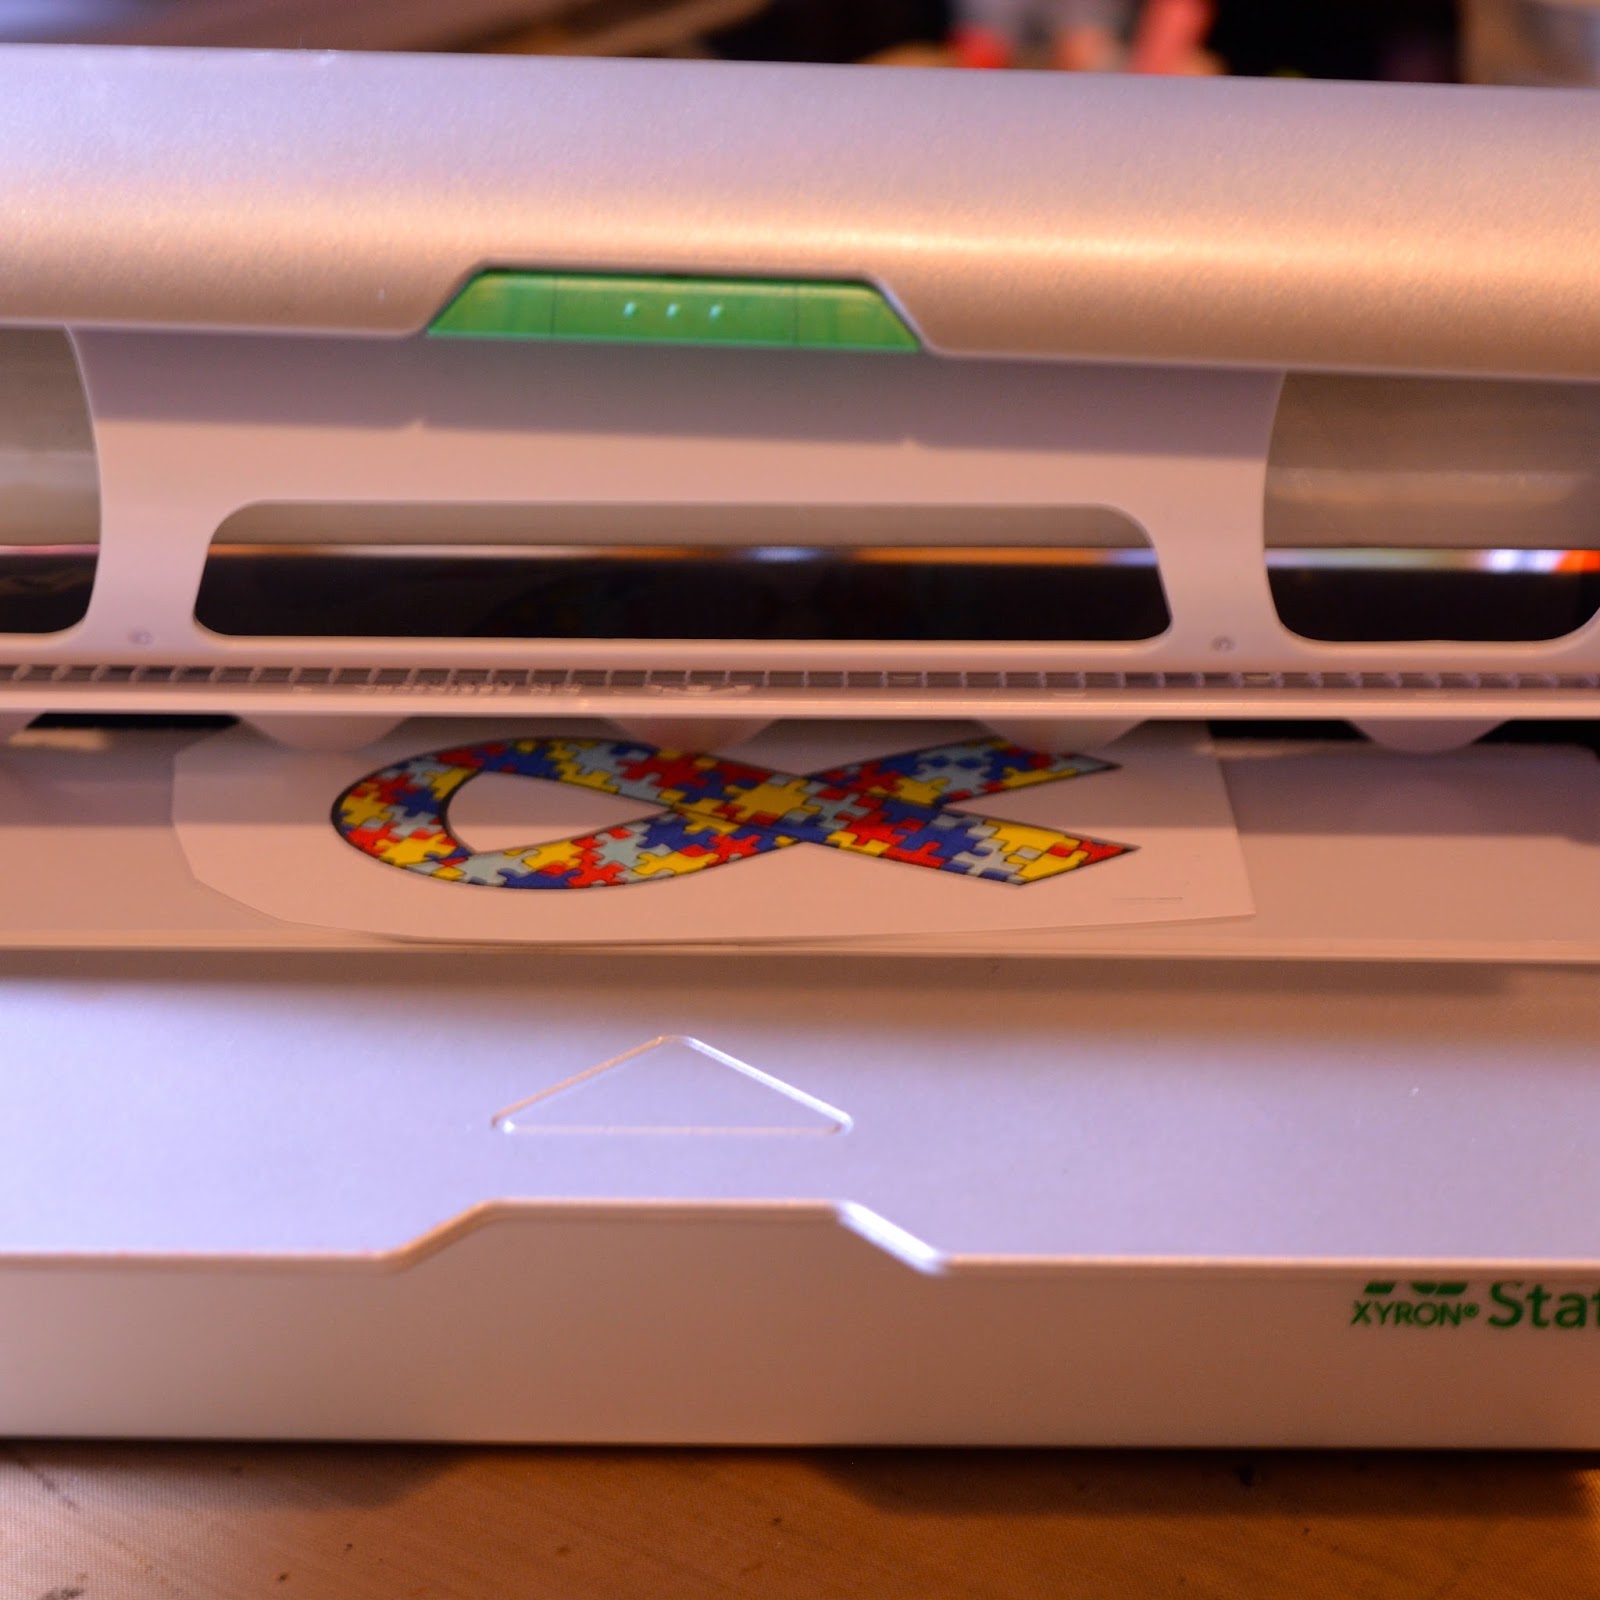
6. Run the completed ribbon through the Xyron Creative Station.


7. Cut out the ribbon.


8. To make the coordinating card repeat steps 1-4.  Cut out the completed ribbon and adhere to the watercolor background using homemade Xyron Foam tape.

9, Stamp the sentiment onto the background adjacent to the ribbon and color small puzzle pieces with Copics.


I love this combo of card and coordinating magnet!! Such a great gift.
Thanks for joining me today and be sure to check out all the fantastic stamps from Deep Red and leave a comment below by 11/9 for a chance at the $45 coupon!!


Friday, October 16, 2015

Happy Halloween- Cut it Up Style

For this week's Cut it Up Challenge the theme is Halloween tags-no cards!
And of course, as always, you must use a die cut.  Check out all of the DT inspiration here.  
For my tag I chose to use the Tim Holtz new Bigz die cut Ghosts!  I have made several Halloween cards with this die cut already this year- check them out here.

But here's what I came up with for my tag:


I actually made this background tag last year and never used it so it came in handy! The technique used is called waxed paper resist and you can see an amazing tutorial from Anna-Karin on her blog demonstrating this. Thanks for the inspiration Anna!
The ghosts were die cut from core 'dinations  whitewash collection and distressed a bit with Black Soot distress ink.  Purple stickles to match the background was added to the ghost's eyes and mouth for some extra texture. 

So come join the fun and celebrate Halloween with us at this week's Cut it Up Challenge- cannot wait tot see what you all create!


Thursday, October 15, 2015

Congratulations Favor Box with Xyron & Teresa Collins


Happy Thursday everyone! Today I am here to share a tutorial on how to made some super sweet favor boxes for any special occasion. We have our engagement party coming up soon so I decided to make these favor boxes using the fantastic papers from the Teresa Collins Wanderlust collection and my Xyron Adhesives.  Although these are "travel" themed papers- some of the Foiled pieces are so elegant I decided to "think outside the box" and use them for this project.


Box with lid open.


 Front of Box


Backside


Top


Xyron Creative Station, Xyron 9” Permanent Adhesive Cartridge, Xyron Mega Runner

Other Products Used:
Teresa Collins Wanderlust Papers-Plus Foiled Paper, Sizzix Little Sizzles Matboard Black 6x13, Sizzix  Box #1 Bigz XL die, Tim Holtz Vagabond, Ranger Queen’s Gold Embossing Powder, Versamark Ink, Congratulations Stamp, Washi Tape, Fiskars Paper Trimmer

Step by Step Directions


Cut out from the black Sizzix mat board, using the Sizzix Bigz Box die 2 of the larger box pieces. 

Fold each box piece on the score lines. 

Using the Xyron Mega Runner apply adhesive to the tab portions of each box piece, leaving one tab without adhesive for the top opening. 


 Assemble the 2 box pieces together via the tabs, press and  hold to ensure a secure fit. 


Cut the Teresa Collins Plus Foil paper into 2.5” x 2.5” cubes with a paper trimmer (6 for each box).
Run the squares through the Xyron Creative Station loaded with the 9” adhesive cartridge Repeat until all pieces have adhesive on the backside. 


Carefully adhere each piece to one side of the assembled box-ensuring the line up the paper with the edges. 


Apply small width Washi Tape to each seam of the box and onto the front lip. 


Stamp the congratulations stamp in Versamark Ink and emboss with gold embossing powder.
 Cut out the Congratuations sentiment using an appropriate size circle die but running it through a die cut machine.


Apply adhesive to the back of the circle with the Xyron Mega Runner and adhere to front of favor box. 
Add heart embellishments and bow to top of completed box.
Tip: To ensure good coverage of adhesive burnish the squares after running through the Xyron and before removing the protective liner and adhering them to the box.

Thanks for joining me today and I sure hope you try out this fun project!


Saturday, October 3, 2015

Fright Night

Good morning Junkies! A fall chill is in the air here in New England today-and what better way to celebrate October and Fall than with a Halloween project.


For this card I used the Fright Night  sentiment and the Spider Webs for the background. 
The Spider Web background was stamped with acrylic black paint and used as a resist. Distress ink was applied over top with a blending tool-Twisted Citron and Wilted Violet-2 fantastic colors for Halloween.


I added the Tim Holtz Sizzix Ghosts die cut -this coordinates so well with this stamped background!

Embrace Imperfection!
Pam

Friday, October 2, 2015

Back to Nature: Cut It Up Challenge DT Inspiration

Hello crafty friends! TGIF!! I have to say I am enjoying this beautiful Fall weather- crisp and cool mornings and evenings!  Last Saturday we went for the first hike of the Fall season and it was incredible.
Along the way to the peak I was taking in all the sites and looking for some inspiration for this week's Cut it Up Challenge Back to Nature. Believe it or not the leaves are already starting to change color-so there were so many beautiful colors of leaves along the edges of the trail I decided to use this for my project focus this week.


I used Tim Holtz's Tattered Leaves die for my die-cut and cut the leaves from Kraft Glassine paper after coloring with Alcohol inks and wrinkling to get the look of tattered leaves.
I placed all the leaves in a pile of sorts onto a background I had made previously. 


Alcohol Inks on Kraft Glassine looks amazing and the texture once crinkled looks exactly like a real leaf!
I encourage you to get outside, take a walk or a hike and look around-take in nature. You will be surprised how much inspiration abounds!
Thanks for joining me this week and I hope you join in the fun for the Cut It Up Challenge-Back to Nature!
Embrace Imperfection!
Pam

Thursday, October 1, 2015

Technique Junkies October Blog Hop!

Happy October Junkies!

The  Technique Junkie Design Team is celebrating October with a blog hop showcasing all of the new designs for this month.  You should have arrived here from the Design Team Blog-if not be sure to start there so not to miss all the great inspiration!

You can SAVE during these celebration days as well.  The October Release stamps will be on SALE (15% OFF) until the 9th!  Get them while their hot!! The discount will show up automatically in your cart.


My project features the October Release: IncrediBall Canning Jar.  This is such a fun set, especially for the Fall! For this card I combined techniques-altered patterned paper and paper piecing  to create a repeating background.


There is also another release this month that coordinates with this set- the Incrediball labels-be sure to check them out too!

Thanks so much for joining me today and be sure not to miss the rest of the hop for more incredible inspiration.  Your next stop on the hop is the FABULOUS Sally Lynn MacDonald-she is an amazing artist and her work is not to be missed! Honored to be on this great team with her!
The entire blog line up is below in case you go astray and need to find your way back!
As always, Embrace Imperfection!
Pam

Pam DeChellis  YOU ARE HERE