Friday, December 19, 2014

It's Beginning to look a lot like Christmas...Tim Holtz Style

Well Christmas is 7 days always and all my Christmas cards are done...made 42 total and some gift card holders. Wanted to use some new techniques and also as many Tim stamps as possible.  Here is a sample of my cards:

The background here is painted enamel- love this technique!


I used brown flocking on the reindeer for texture.


Next up are the winter wonderland cards:


Backgound here is done with alcohol inks! I entered this one into the Simon Says Stamp Monday Challenge Winter Stamping. See details here.


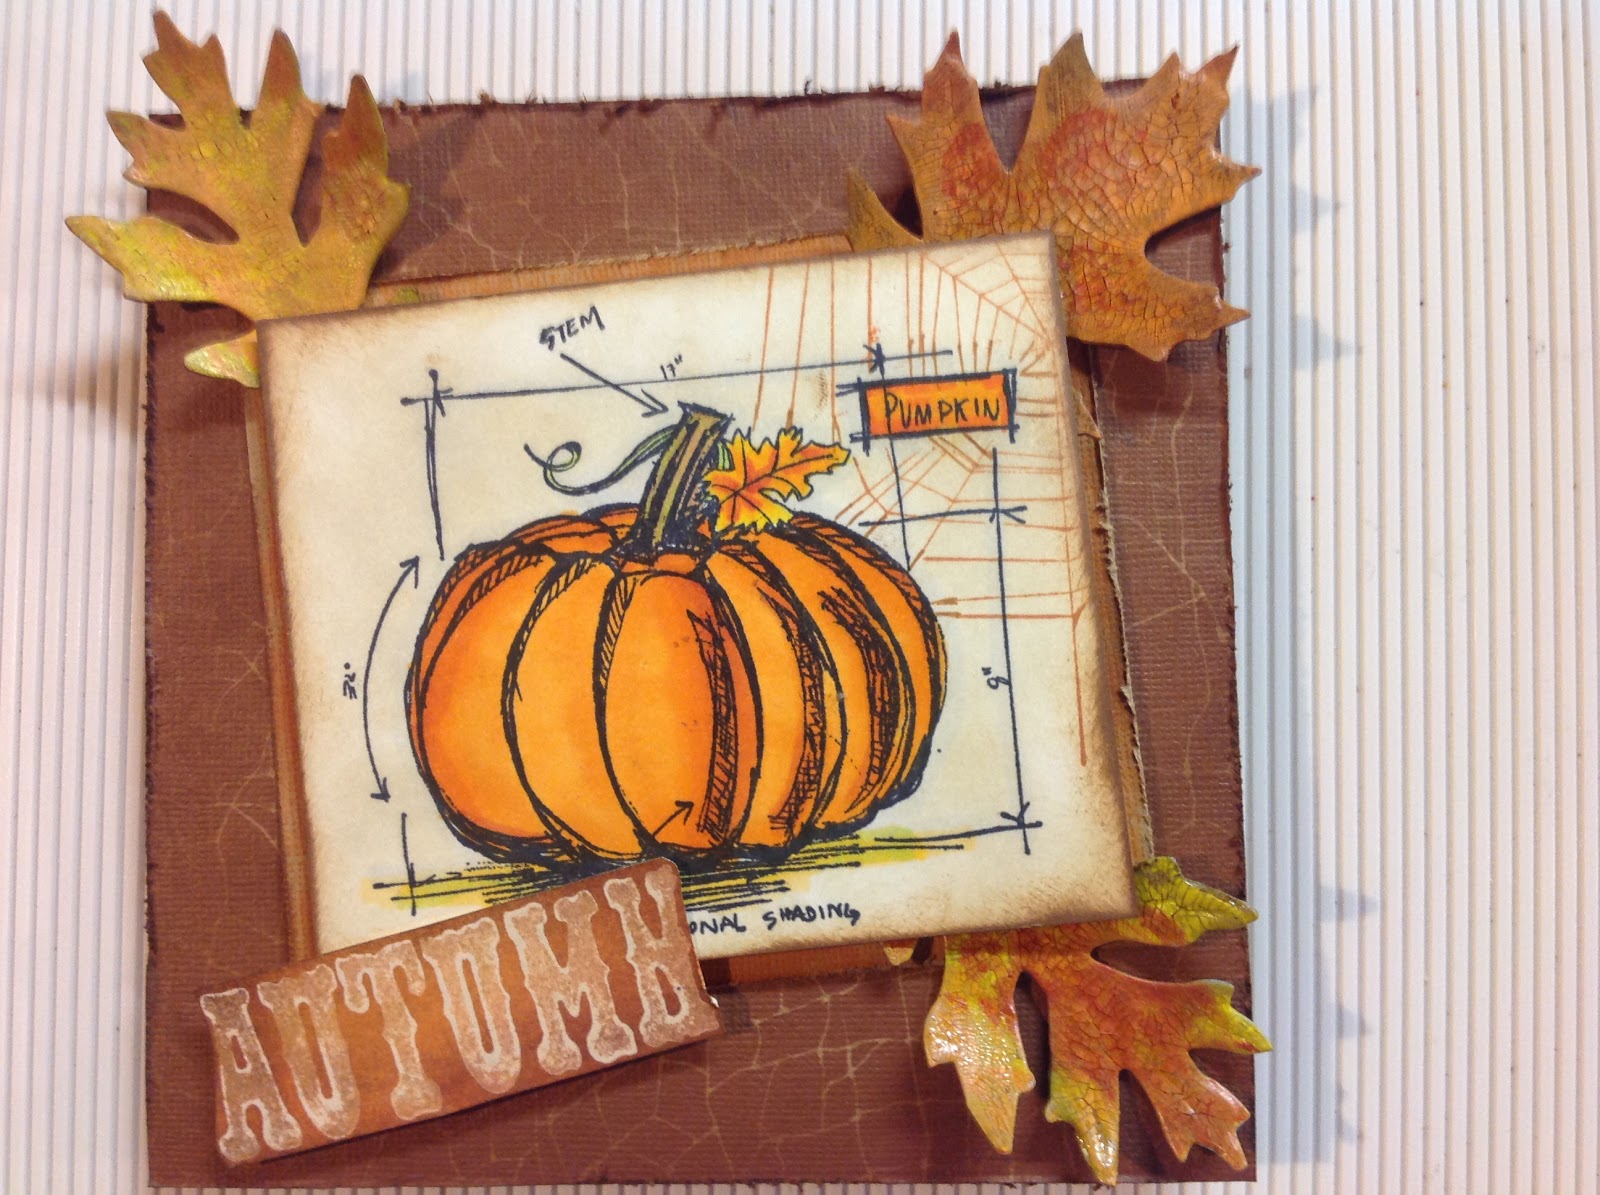
And now for the blueprints:


A few inspired by Tim's tutorial on the Ranger blog:


And of course the gift card holders-Katie made these!
She is so talented!


Hope everyone has a very Merry Christmas and a Happy New Year!


Saturday, December 13, 2014

Ho Ho Ho.....

Made this super cute Santa card yesterday and wanted to share.  I have been wanting to do the chimney for a while now and I just love how it came out.  I inked up the Tim Holtz Brick Wall embossing folder with Pumice Stone distress ink and ran it through the vagabond to get the color of the cement in between the bricks.  Then I went over the raised bricks with Fired Brick distress ink and a blending tool.  I used the drippings from the Alterations Bigz die Candlelight for the snow.  I covered them with texture paste and distress tickles rock candy glitter for texture.  For the Santa- I painted all the pieces, inked the edges and applied snow batting to his beard for actual fuzzy texture.  I used distress rock candy glitter on his hat, pom pom and mustache!  I placed both pieces with pop-dots on Tim Holtz Merriment paper- "twas the night before Christmas"- how appropriate!


Thursday, December 4, 2014

The Countdown begins.....

Cannot even believe it is already December and we have started the Christmas countdown.  This year to commemorate the days leading up to my favorite holiday I made some advent calendars.  Thanks to the inspiration of Tim Holtz and his media team member Anna-Karin. Instructions for the advent calendar are here on Anna-Karin's blog Layers of Ink.  I also made three others in less of the vintage style for my sister, a friend and of course us!

Here they are:


And of course the one for my sister HAD to have snowmen on it:


The other two: 


For the latter ones- I added my own flair and used wash tape around all the edges instead of painting. I love the candy cane look and feel that it gave to the project.  I also used Tim Holtz's Letterpress and some decorated trees (colored with distress stain sprays of course) to add some interest to the top!
Let the countdown begin! Oh, and most importantly all drawers were filled with yummy surprises!

Sunday, November 30, 2014

Tim Holtz Assemblage Clock

Well it's been a bit since my last post as I have been relocating, redesigning and moving my studio-blog entry and pictures to come.  Wanted to share some holiday projects I have been working on in the meanwhile.  First up is Tim's Assemblage Clock.  You can purchase the instructions from Tim's Etsy store here. First I made one just like Tim's:


And then decided to make one with a snowman theme for my sister as she LOVES snowmen:


Just love the assemblage clock idea- so many ways to decorate. Thanks for the inspiration Tim! 

Thursday, November 6, 2014

12 Tags of 2014-November Tim Holtz

Because the weather here has been so frigid (for fall), I decided to get a little "frosty" with my November tag.  I also completed the tag as Tim did with the Layered leaf, but liked the winter wonderland look better.  Using the same techniques as Tim Holtz did in his tutorial for 12 tags, I
created my tag below:


I used Broken China, Picket Fence, and Pumice Stone distress paint to create the backgorund on the tag, then ran it throw the vagabond with the snowflake embossing folder.  I used Pumice Stone distress ink on the raised portions of the folder before running it through. I then used the corrugated cardboard and sprayed with Brushed Pewter, Picket Fence and Salty Ocean distress stain sprays.  I finished by coloring the word WONDERFUL with distrss paints and wiping off gently. 

Friday, October 17, 2014

12 Tags of 2014 October Tim Holtz....and then some!

Finally back in the studio for some fall creations, inspired by the beautiful foliage.  Took a trip up to the White Mountains last weekend and now the color is peaking here at home!  First off is my entry for 12 Tags October.  Love the new distress sprays and had to order them in every color of course!


Next up from the fall inspiration is the card below using Tim's Pumpkin Blueprint stamp, colored with Copics and some accent leaves. Just love Fall cards, such great color combos!


Lastly I finished a great project that Shelly Hickox wrote a tutorial for on her blog- I love that you can create just about anything with paper and chipboard/matboard!  I really love how this piece came out and plan to make an advent calendar next for Christmas!


Friday, August 15, 2014

Moments....Tim Holtz Blueprints Fall

As the summer winds down, I have been getting in the Fall/Halloween mood!  Just love all the great colors associated with that time of year.  So...I created my first fall card this year with the Tim Holtz Blueprint Oak stamp- using the Sizzix Framelits kit to cut out different pieces of the leaf and layer for dimension and color! Just love these sets, although I will admit that "fussy" cutting is relaxing to me! I used Distress Ink with a watercolor brush to get just the right mix of colors

After finishing the main frame of the card I decided to mount it on a square piece of corrugated folded card and tucked some altered tattered leaves under for additional efffect.  I just love how this card came together and the all the colors.


I am busy in the studio creating and making a ton of cards for an upcoming fair where for the first time I will be selling my work and ALL the proceeds will be going to a local dachshund rescue!  More info to come on the time Cannot wait to see how it goes! I am a little nervous !


Friday, August 8, 2014

Halloween Creations

Well I know it's still summer and the weather is beautiful but I have been busy in the studio working on some Halloween projects.  By no means am I trying to rush summer but Fall /Halloween is my absolute favorite time of year!  So I thought I would post some pics of some cards I have done so far. Some have definitely been inspired by Tim Holtz, Richele Christensen and Anna-Karin where I have taken bits and pieces of some of their projects and gone a bit astray to create my own.


Candlelight Fright using beeswax from the melting pot for the candles-great texture!


I am attempting to use ALL my Halloween stash and using that as a bit of a challenge.


Love how the tissue paper effect on the headstone makes it look old.  Just love creating texture effects!!   Rangerhas a great tutorial on this!


I used my Stamp2Cut to cut out the witch in the size I want since I don't have this die!  Love my eclips and stamp2cut, endless possibilities.


Hope you enjoy! Happy Halloween!