Happy Tuesday everyone! Can you believe that next week it's Christmas? Well there is still time to get those Christmas greetings out and today I am sharing a quick tutorial for a Christmas card using Clearsnap Colorbox Dye ink Spritzer, Colorbox Art Screens and Xyron Adhesives.
Xyron Products Used: Xyron Creative Station, 9" Permanent Adhesive Cartridge, Xyron 1.5 " Sticker Maker, Xyron Mega Runner
Other Products Used: Colorbox Art Screen Stripes , Colorbox Spritzer Fireberry, Ranger Festive Berries Distress Ink, Tim Holtz Holiday Blueprint Stamps, Christmas Red Stickles, Tim Holtz Watercolor Paper, Copic Markers, Memento Tuxedo Black Ink, Ranger Heat Tool
Step By Step Instructions
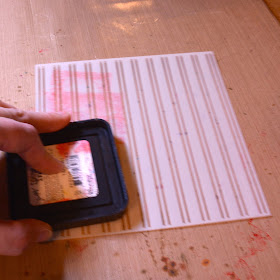
1. Apply Distress ink directly to the back of the Colorbox Art Screen.
2. Spritz with Colorbox Dye ink Spritzer.
3. Carefully place the Art screen, ink side down onto watercolor paper and place a paper towel over and gently press down on art screen.
4. Remove Art Screen carefully.
5. Dry completely with Heat Tool.
6. Stamp image onto white card stock with Memento Black Ink.
7. Color image with Copic markers and cut out.
8. Stamp image again onto the background created (stencil mono print) with Ranger Archival Black ink.
9. Run the cut image through the Xyron Creative Station, loaded with either the 5' Permanent Adhesive Cartridge or the 9".
10. Adhere the image to it's corresponding spot on the card.
11. Cut out the "candy cane" label and run it through the Xyron 1.5" sticker maker and adhere to card.
12. Apply Stickles and Wink of Stella to candy cane for added shimmer and texture.
13. Use the Xyron Mega Runner to adhere to a card base 4.25" x 5.5".
Thanks for joining me today for the Xyron/Clearsnap partner tutorial and I hope everyone has very Merry Christmas and Happy and Safe New Year!


No comments:
Post a Comment
Post a Comment