Monday, November 30, 2015

Advent Calendar with Xyron & Pebbles

Have you started counting down the days until Christmas yet? Well Xyron and Pebbles have in this super fun tutorial on making an Advent Calendar!  Best part is there are goodies inside to reward you for all your craftiness while you count down the days until Santa brings you everything on your craft list...that's if you haven't been naughty-lol.

  
Advent Calendar featuring paper by Pebbles


Close up of the goodies inside!


Back 


Sides

Supplies
Xyron Products Used: Xyron Mega Runner, Xyron 1.5" Create-a-Sticker, Xyron Creative Station, Xyron 9" Permanent Adhesive Refill
Other Products: Pebbles Winter Wonderland Collection, Advent Calendar, DCWV Glitter Stack, Washi Tape, Tim Holtz Snowflake punch, Tim Holtz Alphabet Thinlits, White Gesso,Heat Tool, black card stock 

Step by Step Instructions


 1. Paint entire advent calendar with an even cost of white gesso.


2. Dry completely with heat tool or set aside to dry.


3. Paint each individual box with white gesso (except for inside).


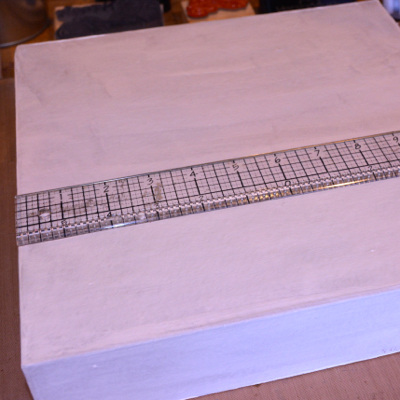
4. Measure dimensions of backside of calendar.


5. Cut the 12 x 12 Pebbles paper to the dimensions from step 4 using a paper trimmer.


6. Apply adhesive using the Xyron Mega runner to backside of paper from step 5.


7. Adhere evenly and smoothly to back of calendar.
8. measure dimension of sides, top and bottom of calendar and cut from Pebbles  paper using a paper trimmer.


9. Run these cut pieces through the Xyron Creative Station loaded with the 9" Permanent Adhesive cartridge.


10. Adhere pieces to top, bottom and side of calendar smoothly and evenly.


11. Measure dimensions of front of drawers and cut 25 pieces from coordinating paper (Pebbles).


12. Run pieces through the Xyron Creative Station until all have adhesive.


13. Adhere to front of each drawer and trim out notch.


14. Use Tim Holtz snowflake punch to punch 25  snowflakes from glitter paper.


15. Using a die cut machine and Tim Holtz thinlits (alphabet) cut the numbers 1-25 from black card stock.


16. Run each number through the Xyron 1.5" Create-a Sticker.


17. Run each snowflake through the Xyron 1.5" Create-a Sticker.


18. Adhere each number (1-25) to a snowflake.


19. Adhere each snowflake to a finished drawer.
20. Add some coordinating washi tape around the seams and some snowflake embellishments to the top and side.


Saturday, November 28, 2015

Christmas is coming...with Technique Junkies

Happy Saturday Junkies! I hope everyone had a wonderful Thanksgiving with their loved ones.  Have we all recovered from the turkey and stuffing overload?? I know I haven't yet!  And of course the days after Thanksgiving mark the start of the Christmas season.  I have a fun card project today featuring just that!


I created an artsy background using the Technique Junkies  Christmas Trees, Set of 6 stamp set, alternating stamping with Ranger Dye Inks Electric Lime and Green.


To add a bit of pizzaz I sprayed the entire panel with red, green and white ink sprays to give it an abstract artsy feel.


The sentiment is from the Simple Sentiments 1b which contains so many great sentiments for every occasion- a must have!!  I added some stars for a bit of dimension and interest to the trees.
A simple yet artsy Christmas card to send to friends and family!
Thanks for joining me today and remember only 27 more crafting days left till Christmas!!
Embrace imperfection!
Pam


Thursday, November 26, 2015

Happy Thanksgiving!

Happy Thursday everyone and Happy Thanksgiving!! Here today to share some Christmas inspiration!  It is that time of year now-only 29 days till Christmas, have you started making your Christmas cards/projects yet? Here's a fun one featuring Paper Wings Productions' stamps:


I love how this one layer card has so much dimension and texture and is super fun to create.  I started by stamping the Big Textures background stamp with white acrylic paint to create a background resist. After drying Ranger Distress Stain Festive Berries was applied over top. 
And then the magic happens- I stamped the tree from the wood cuts set over the background and I just love how it melts into the background as the white paint resists the ink. 


I am going to make a few more of these to send as Christmas cards-adding a fun holiday sentiment inside!
Thanks for joining me today and Happy Turkey Day! Enjoy with your loved ones!
Embrace Imperfection!
Pam

Wednesday, November 25, 2015

Wake up...and Smell the Coffee!

Happy Wednesday all- and Happy Thanksgiving eve...hope everyone is able to spend time with their loved ones and celebrate all they are thankful for!
I am so thankful for my wonderful fiancee, my family, friends and amazing pups!  And for those of you that know me-I am thankful for COFFEE, lol!!

Today's project features three of the Just for Fun coffee themed stamps, these are just the best!!


And I also made a set of note cards using the Coffee Background.


For all these cards, the Coffee Background was stamped onto manila card stock using Ranger Java Bean paint! Yes, paint- a technique called paint resist.  Over top I applied Ranger Distress stain Antique Linen.   I love the artistic feel of these stamps and this technique really showcases that.


The coffee pot stamp was stamped in Versafine Black, embossed with clear embossing powder and colored with silver Wink of Stella.


Thanks so much for joining me today and again I wish everyone a very Happy Turkey Day!
Embrace Imperfection!
Pam


Tuesday, November 17, 2015

Santa Claus is Coming to Town: Xyron & Faber Castell Blog Hop

Happy Tuesday all!! 
Today's project is celebrating the partnership between Design Memory Craft-Faber Castell and Xyron and is part of a week long blog hop!


Did you know there are only  more 39 more days until Christmas? Santa Claus is coming to town, he is making his list and checking it twice!! So...well you know the rest lol.
Here's my project and a step by step tutorial to follow:


Supplies Used
Xyron Products: Xyron Mega Runner, Xyron 1.5" Sticker Maker
Other Supplies: Faber Castell Whipped Spackle, Faber Castell Gelatos, Distress Ink: Vintage Photo/Black Soot, Tim Holtz Sizzix St Nick Bigz Die, Ranger Distress Glitter-Clear Rock Candy, Tim Holtz Vagabond, Matte Multi Media, Red Stickles, The Crafter's Workshop Brick stencil, Tim Holtz Candlelight Bigz die, Tim Holtz Grunge Paper

Step by Step Instructions

1. Cut a piece of white card stock to 4.25" x 5.5" and apply Black Soot Distress Ink direct to paper.


  2. Tape down the stencil, centering over the card stock from step one.


3. Apply Faber Castell Gelato-Red to craft sheet.


4. Mix Whipped Spackle with the gelato to colorize the sparkle. Mix with palette knife until homogenous.


5. Spread colored sparkle evenly over the stencil.
6. Carefully remove stencil and set piece aside to dry. Immediately place stencil in water or wash.


7. Using a die cut machine and the Candlelight die , cut wax drippings from grunge paper.


8. Line up the different size wax drip pieces in the order you want them to make snow drifts on the brick chimney.


9. Color each piece with white gelato.


10. Run each piece through the Xyron 1.5" Sticker maker.


11. Adhere the drip pieces to the top of the chimney.


12. Apply whipped sparkle to the drip pieces with a palette knife.


13. Sprinkle Distress glitter over the spackle while it is still wet.

14. Using a die cut machine and the Tim Holtz St Nick die, cut the pieces of St. Nick from grunge paper.


15. Color each piece with the Faber Castell gelatos- red, green, white, pink, black.
16. Adhere all pieces of St Nick together, sprinkle on some distress glitter, and add some cotton for his beard.


17. Apply Xyron homemade foam tap to the back of St Nick and adhere to the chimney.


Thanks so much for joining me today and be sure to follow Xyron and Design Memory Craft this week for our partner blog hop!