Wednesday, July 29, 2015

Movie Night? Xyron/DCWV Popcorn Box Tutorial


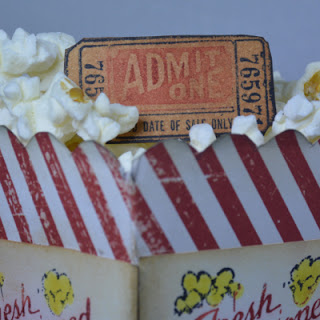
Movie night? Or just looking for a fun way to gift some movie tickets?  Look no further- check out this cool tutorial using the DCWV Favor Box Stack- Popcorn Box Template and Xyron Creative Station to make some fun Popcorn Boxes!


Xyron Products Used: 
Xyron Creative Station, Xyron 9” Permanent Adhesive Cartridge

Other Products Used: 
DCWV Project Stack: Favor Boxes, Tim Holtz At the Movies CMS081 stamp set, Ranger Archival Black Ink, Neenah Solar White card stock, Distress Ink Antique Linen, Distress Ink Vintage Photo, Ranger Heat It Craft Tool, Ranger Inkessentials Non-stick Craft sheet, Tim Holtz Paper Stash Merriment, Tim Holtz Scissors, Distress Marker-Barn Door, Squeezed Lemonade, Ranger Matte Multi Medium


Step by Step Instructions

1. Cut out shape of Popcorn box template  on solid lines.


2. Trace onto Tim Holtz Striped card stock from Merriment collection 


3. Using runner draw in dotted lines for folding template.


4. Cut out shape on solid lines from striped card stock.


5. Score on the dotted lines created.


6. Fold box  on scored lines .

]

7. Apply Ranger Matte Multi Medium to tab on side and bottom of box and assemble Popcorn box.


8. Trace side of box onto Neenah Solar White card stock to use as a guide for stamping image x 4 
.

9.    Apply Barn Door ink to the “Popcorn center” and the “Fresh Popcorn” portion of the rubber stamp. 


10.  Apply Archival Black Ink to the rest of the stamp (popcorn pieces).


11. Repeat steps 9&10 and Stamp image x 4 centered between the guides made in step 8 and dry with heat tool.


12. Color in popcorn with Distress Marker-Squeezed Lemonade.


13. Trim and ink edges with Antique Linen Distress ink using a blending tool.


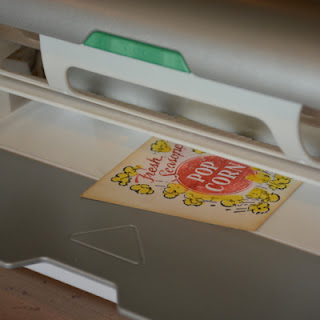
14. Run the stamped image piece through the Xyron Creative Station loaded with the 9” Permanent Adhesive cartridge  x 4.


15. Adhere  stamped image to  each side of the popcorn box, ensuring to center and line up each.  Trim excess off side if needed.


Tuesday, July 28, 2015

Awake My Soul

Happy Tuesday all!  I am here today to share a project using the Awake My Soul stamp. This is one of my favorites from Paper Wings Productions.


This stamp has such a presence on it's own I wanted to make a one layer card and have it be the focal point.  To give the card an airy feel I used the My Favorite Things Cloudy Day stencil along with the Tim Holtz Distress Marker mister and various shades of blue Distress markers.


After drying completely with a heat tool,  


the paper was inked with Tumbled Glass Distress ink using a blending tool.


The image was stamped in Archival Black ink over top the clouds background.


Here is a close up of the final result:


Thanks for joining me today and I hope this project has inspired you as much as it inspired me!

Embrace Imperfection!
Pam


Saturday, July 25, 2015

Winning Hand


Happy Saturday Junkies! Pam here and I am back with another fantastic stamp showcase from TJ.  This is another set I picked up at the rubber stamp show last month and I have been dying to "play" with it lol.
The set is called Winning Hand and it is part of the Palettini line.  There is also a great sentiment to coordinate with this called Lend a Hand.

As soon as I saw the Winning Hand set I knew exactly how I wanted to stamp it-with lots of texture so I used Versamark Ink and covered with Ranger Distress Embossing powder Fired Brick.  This gave the cards some texture and really made them stand out.


For the background I wanted a "card game" feel so I used a The Crafters Workshop Stencil with Ranger Distress ink and created a stencil mono print.  
The top card was restamped and cut out again and "popped" on with homemade Xyron dimensional adhesive as was the sentiment.  The sentiment was also stamped with Versamark and covered with Distress Embossing powder- Black Soot- to match the texture o the cards.

Thanks for stopping by today and be sure to check back for more great inspiration from the TJ Design team and my blog for TJ showcases!
Embrace Imperfection!


Friday, July 24, 2015

I, Robot!

Happy Friday crafty peeps! Today I am sharing my DT inspiration project for this week's Cut it Up Challenge.  This week's theme is "Use a Number" and as always you must also you a die cut.

I decided to make a boy's birthday card since I have been dying to use my Tim Holtz mini blueprint Robot stamps.  I call this project I, Robot for those of you who may have seen the movie!


The background piece was created using Ranger Foil card stock which I ran through the Vagabond with the Tim Holtz Sizzix embossing folder.  The technique used to make the foil look like steel is "painted industrial" from Tim Holtz- I thought this would make a super background for these robots.
The blueprints were stamped in Ranger Archival ink and colored with Prismacolor pencils and gamsol. Pumice Stone Distress ink was applied over top and I used some embellishments to really give the "nuts and bolts" effect. The robots were adhered to the background piece with homemade Xyron dimensional tape (see my video here).


The sentiment "celebrate" is my die cut (TH Sizzlits) for this card and it was cut from the foil card stock to coordinate with the background and adhered with the Xyron 3" Sticker Maker.

I hope you join in the fun this week for the Cut It Up Challenge- so get out your dies and die cutting machine and get inky!

I am entering this project in the Simon Says Stamp Monday Challenge i scream for....: 
I, Robot

Thursday, July 23, 2015

Creative Vision Stamps Showcase: Apothecary Labels

Good morning all! So excited to share with you today a sample I made for Creative Vision Stamps showcasing one of their brand new release stamps: Apothecary Labels.  I just love these new stamps and absolutely am ecstatic to start my Halloween projects using them! 


This fabulous stamp set comes with 6 different stamps and I chose to use the CAT SCRATCH fever elixir stamp to make my label. I plan on doing a quick tutorial to show the steps to make the label look like an authentic old apothecary label so stay tuned for that!


The bottle was cut by hand from grunge board and covered with Ranger Crackle Paint Rock Candy.  After drying completely, I applied Brushed Cordouroy Distress Stain over top to give the look of and old brown apothecary bottle. 
The background paper is from the Tim Holtz Laboratorie stash and was distressed with various colors of distress ink. The entire piece was framed using Tim Holtz tissue tape from the same collection.

So head on over to the Creative Vision Stamps store to get these stamps today! They are a must have for all your spooky Halloween creating and they are super fun! And be sure to check out the Creative Rewards Program.


Wednesday, July 22, 2015

Hoping to SEA you Soon! MFT/Xyron Tutorial

This weekend I was so happy to take our fur baby girl to the beach! This was her first big adventure since she came home from the hospital.  She had such a fantastic day and sitting on the beach I was inspired to make this card featuring the fantastic stamps and dies from My Favorite Things paired with the awesome adhesives from Xyron!


Missing someone? Create this cool card featuring the best of summer and the beach by combing the magic of My Favorite Things stamps with the versatility of Xyron!


Xyron Products Used: 
Xyron 3” Sticker Maker, Xyron Mega Runner

Other Products Used:
My Favorite Things LJD Sea Life Stamp Set, MFT Die-Namics LJD Sea Life Die Set, Recollections Corrugated card, Ranger Distress Inks: Mermaid Lagoon, Salty Ocean, Bundled Sage, Vintage Photo, Ranger Distress Embossing Powder: Peeled Paint, Antique Linen, Walnut Stain, Versamark Watermark Ink, Tim Holtz Vagabond, Neenah Desert Storm card stock, Ranger Distress Markers: Wild Honey, Worn Lipstick, Tim Holtz Tiny Attacher, Tim Holtz Kraft Core Shattered card stock, Craft Fish Netting


Step-by-Step Instructions:

1. Ink the corrugate card stock directly with the Mermaid Lagoon and Salty Ocean ink pads.


2. Stamp the Sea Grass with Bundled Sage Distress ink x 3.


3. Cover stamped image with Peeled Paint Distress embossing powder.


4. Heat set/melt  the embossing powder with heat tool.


5. Rub image gently after cooling to release activation crystals.


6. Stamp the larger starfish x 3 in Versamark ink.

6a. Cover with a mixture of Antique Linen and Walnut Stain embossing powder.


7. Heat set/melt the embossing powder, let cool, and gently rub off activation crystals as in steps 4&5.

8. Cut out starfish and sea grass by lining up the coordinating dies and running through die cut machine.


 9. Color the spots on starfish with the Wild Honey and Worn Lipstick distress markers to give some dimension the the starfish.


10.  Ink edges and tops of starfish with Vintage Photo Distress ink.


10a. Ink edges and tops of Sea Grass with Bundled Sage Distress Ink


11. Stamp sentiment in Versamark Ink, 


12. Cover with Back Soot embossing powder, heat set, let cool and rub off release crystals.


13. Cut out sentiment with scissors.


14. Ink edges with Vintage photo Distress ink.


15. Run the Sea Grass (three pieces) through the Xyron 3” Sticker Maker. Rub well and pull off protective film.


16. Adhere Sea Grass to corrugate background.


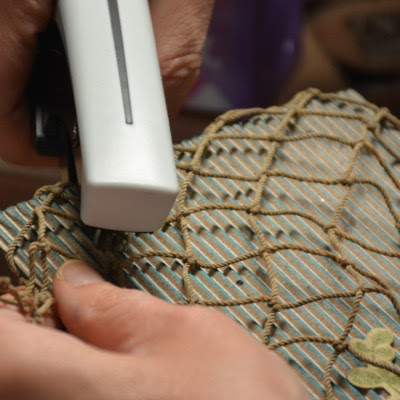
17.Cut piece of fish netting slightly larger than size of card and staple in corners with Tim Holtz Tiny Attacher.


18. Trim edges of fish netting to fit card.


19. Run Starfish (x3) and sentiment through the Xyron 3” Sticker Maker.


20. Adhere atop fish netting.


21. Use Xyron Mega Runner to place adhesive onto back to the project and adhere to Kraft Core Shattered card base.


Thanks for stopping by today! I would love to hear from you, so all comments are welcome below!
Be sure to head over to the My Favorite Things blog for more great inspiration and fabulous projects.